OBS Broadcaster: Advanced Streaming Options
If you're looking for more broadcasting options that will take your stream to the next level, with features like special effects, overlays, and high quality video options, we offer support for OBS.
OBS is free, and once set up: easy to broadcast with!
OBS SETUP OVERVIEW:
- Download OBS from its official site.
- On your CamSoda broadcast page, tap 'Use OBS Broadcaster' to access your unique StreamKey and RTMP URL.
- In OBS, update your stream settings with these credentials, add your video source, and customize your audio and video settings according to your preferences. Typically, the default settings for OBS will work fine.
- Take a look at this video OBS setup guide to see the steps in motion.
Step-by-step Instructions
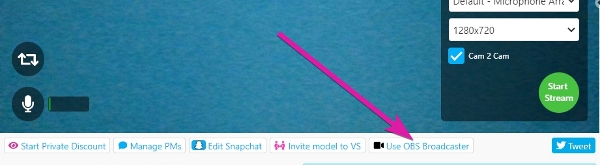
- Underneath your stream window, tap Use OBS Broadcaster.
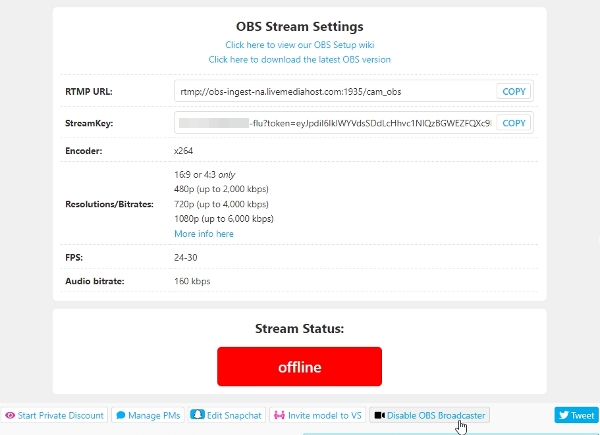
- Copy your RTMP URL and your StreamKey, as you will need to enter them into OBS. Note: your StreamKey is unique, so do not share it with anyone.
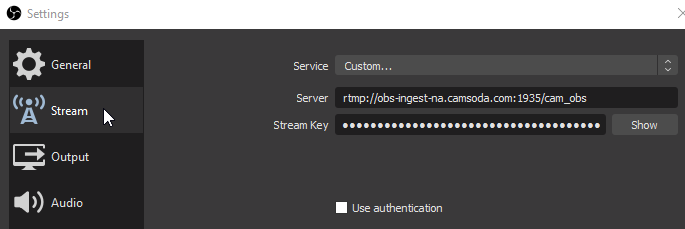
- In OBS, select Settings, and tap on the Stream tab
- Select the CamSoda Service, choose your Server area and enter your Stream Key, or, switch to the "Custom" Service and enter your RTMP URL as the Server, and your Stream Key.
- Remember to click Apply or OK to save your selections
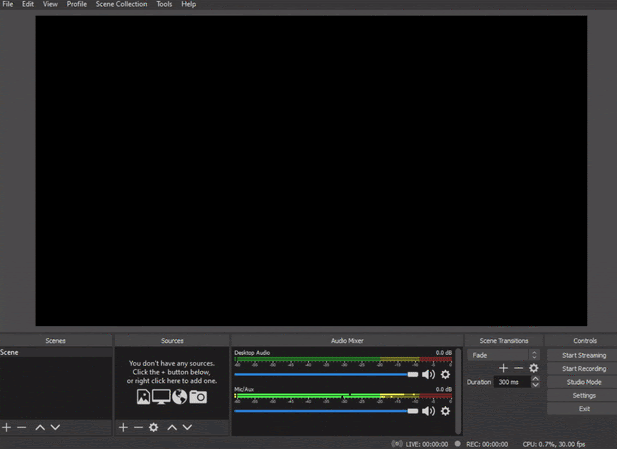
Add Sources
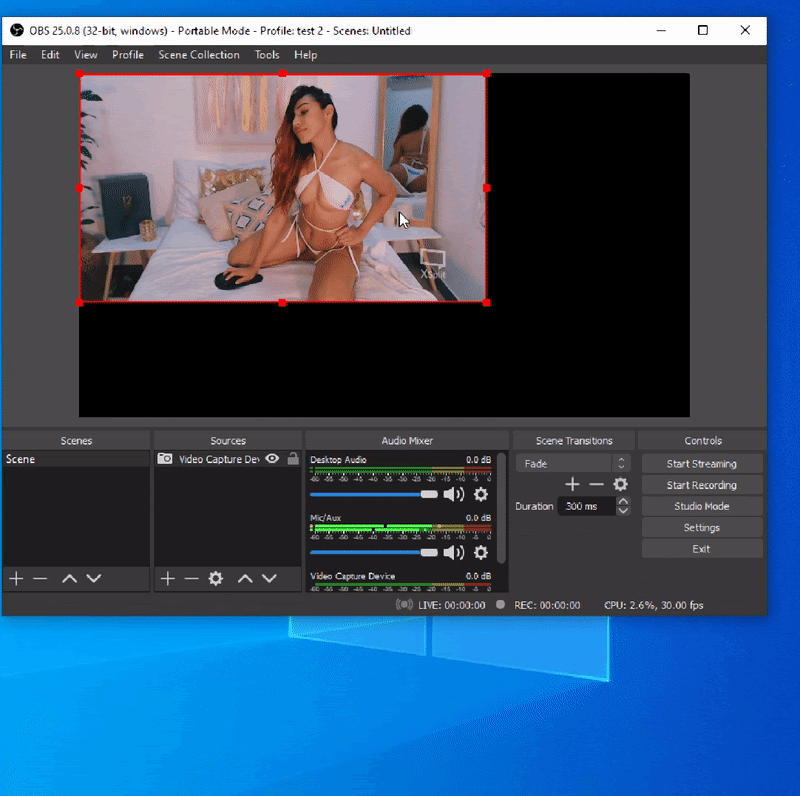
- In the main OBS interface, Click the + and add a new Video Capture Device Source
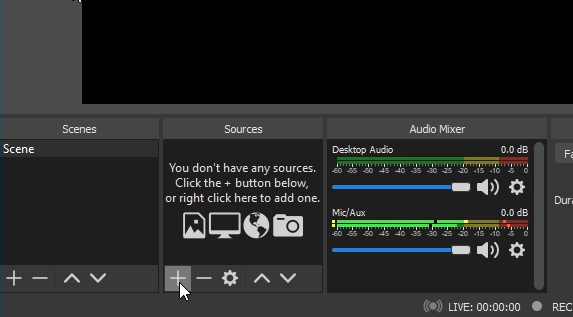
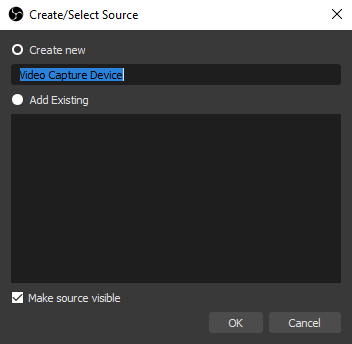
- Choose your camera or virtual camera application from the device list and click OK.
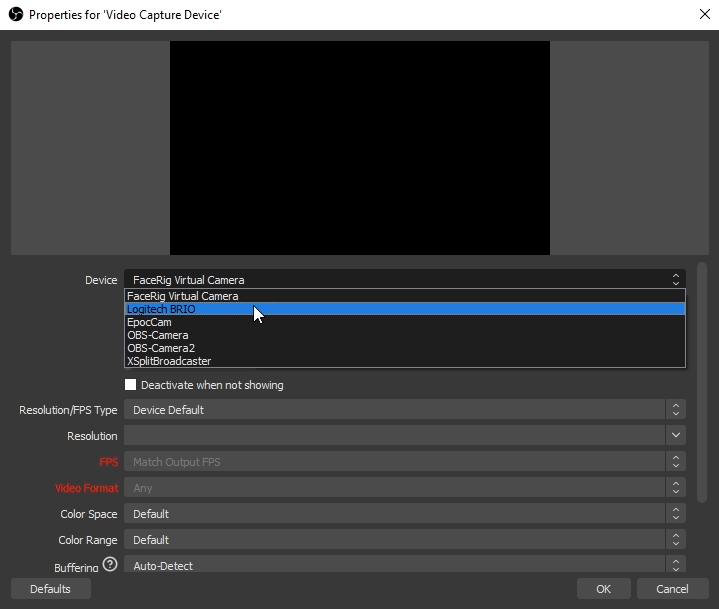
- If the camera image does not fill the OBS Canvas, right click the image and select Transform and then Fit to screen. Note: If your image becomes warped, please check the 'ADVANCED SETTINGS' Section below for tips on adjusting Canvas Size
Start Broadcasting with OBS
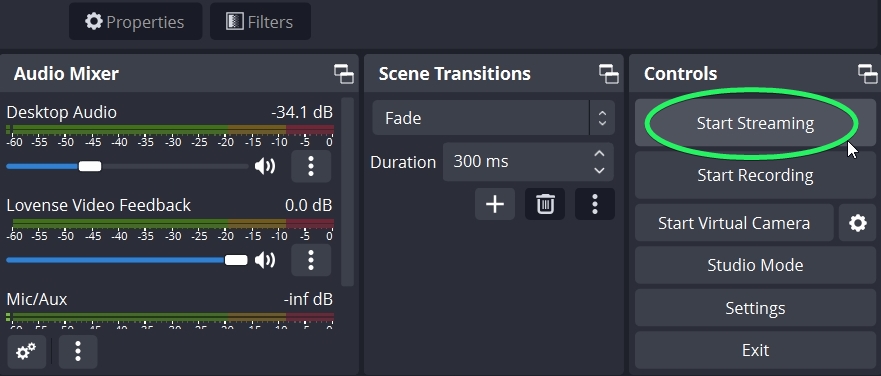
- Once everything is configured correctly and you are ready to go live on the site, click Start Streaming to begin transmitting. If you're using a Virtual Camera, tap Start Virtual Camera instead.
- On your CamSoda page, the red offline Stream Status indicator will change to green / online.
Advanced Settings:
- Windows Sound Settings: Ensure your microphone and speakers are correctly configured.
- Open OBS. If you have an external microphone connected, it should be selected and the sound meter should be moving.
- Your microphone meter should be active to indicate OBS is receiving audio. If there is no movement click the gear and open Properties to select your microphone.
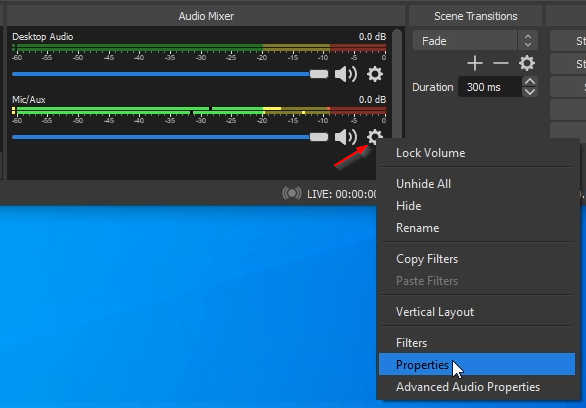
- Open OBS. If you have an external microphone connected, it should be selected and the sound meter should be moving.
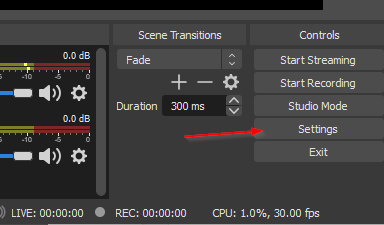
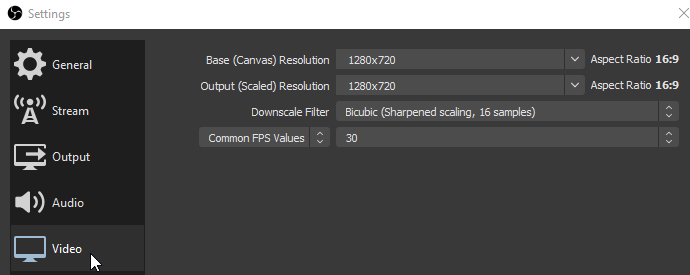
- Video Settings: Adjust the canvas and output resolution, maintaining a 16:9 aspect ratio.
- Open OBS Settings.
- On the video tab you can define your canvas size and output size. In most cases the Canvas Resolution selection should match your desktop or display resolution. The Output Size is the resolution you would like to use for broadcast. For an HD stream the minimum Output Resolution to use is 1280x720.
- We recommend choosing a resolution that maintains a 16:9 Aspect Ratio and a FPS of 24 - 30.
- Open OBS Settings.
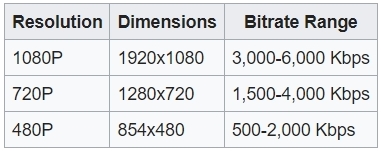
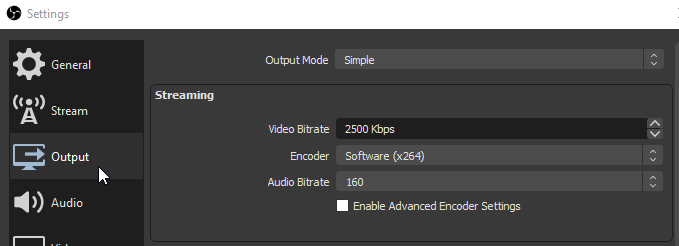
- Output Settings: Select an appropriate bitrate based on your desired resolution. We accept a maximum video bitrate of 50,000kbps.
- Recommended bitrate ranges
- We recommend using the x264 encoder and selecting an audio bitrate of 160.
- Recommended bitrate ranges
- Add Sources:
- In the main OBS interface, Click the + and add a Video Capture Device Source from the list of possible sources.

- Choose your camera or virtual camera application from the device list.
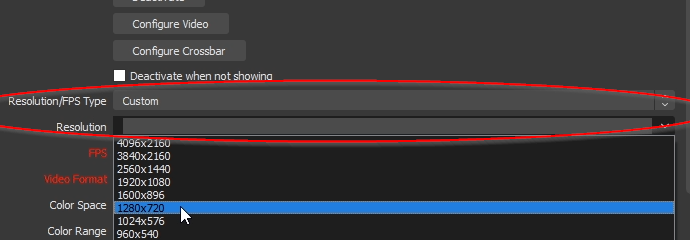
- Change the Resolution to Custom and choose a camera resolution to match your canvas resolution.
- In the main OBS interface, Click the + and add a Video Capture Device Source from the list of possible sources.
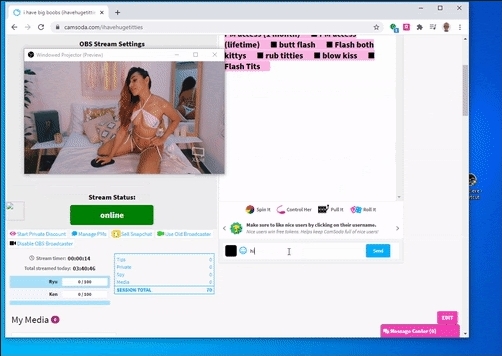
- Projector View: Enable 'Windowed Projector' to view your stream during live chat.
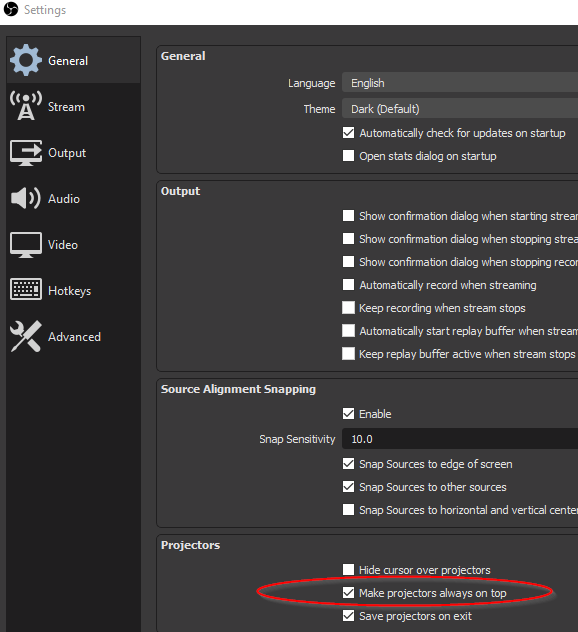
- To view yourself while streaming, in Settings check Make projectors always on top and then save the new settings.
- You can now right click to enable the Windowed Projector (Preview) to view your image during your live chat. Your image will stay on top.
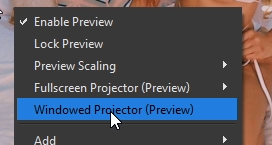
- To view yourself while streaming, in Settings check Make projectors always on top and then save the new settings.